
Shooting photo reference for art
Do you want to paint a dreamy fantasy scene, but don’t know how to start? You’ve got the idea down, but every time you create it, something just feels off or flat?
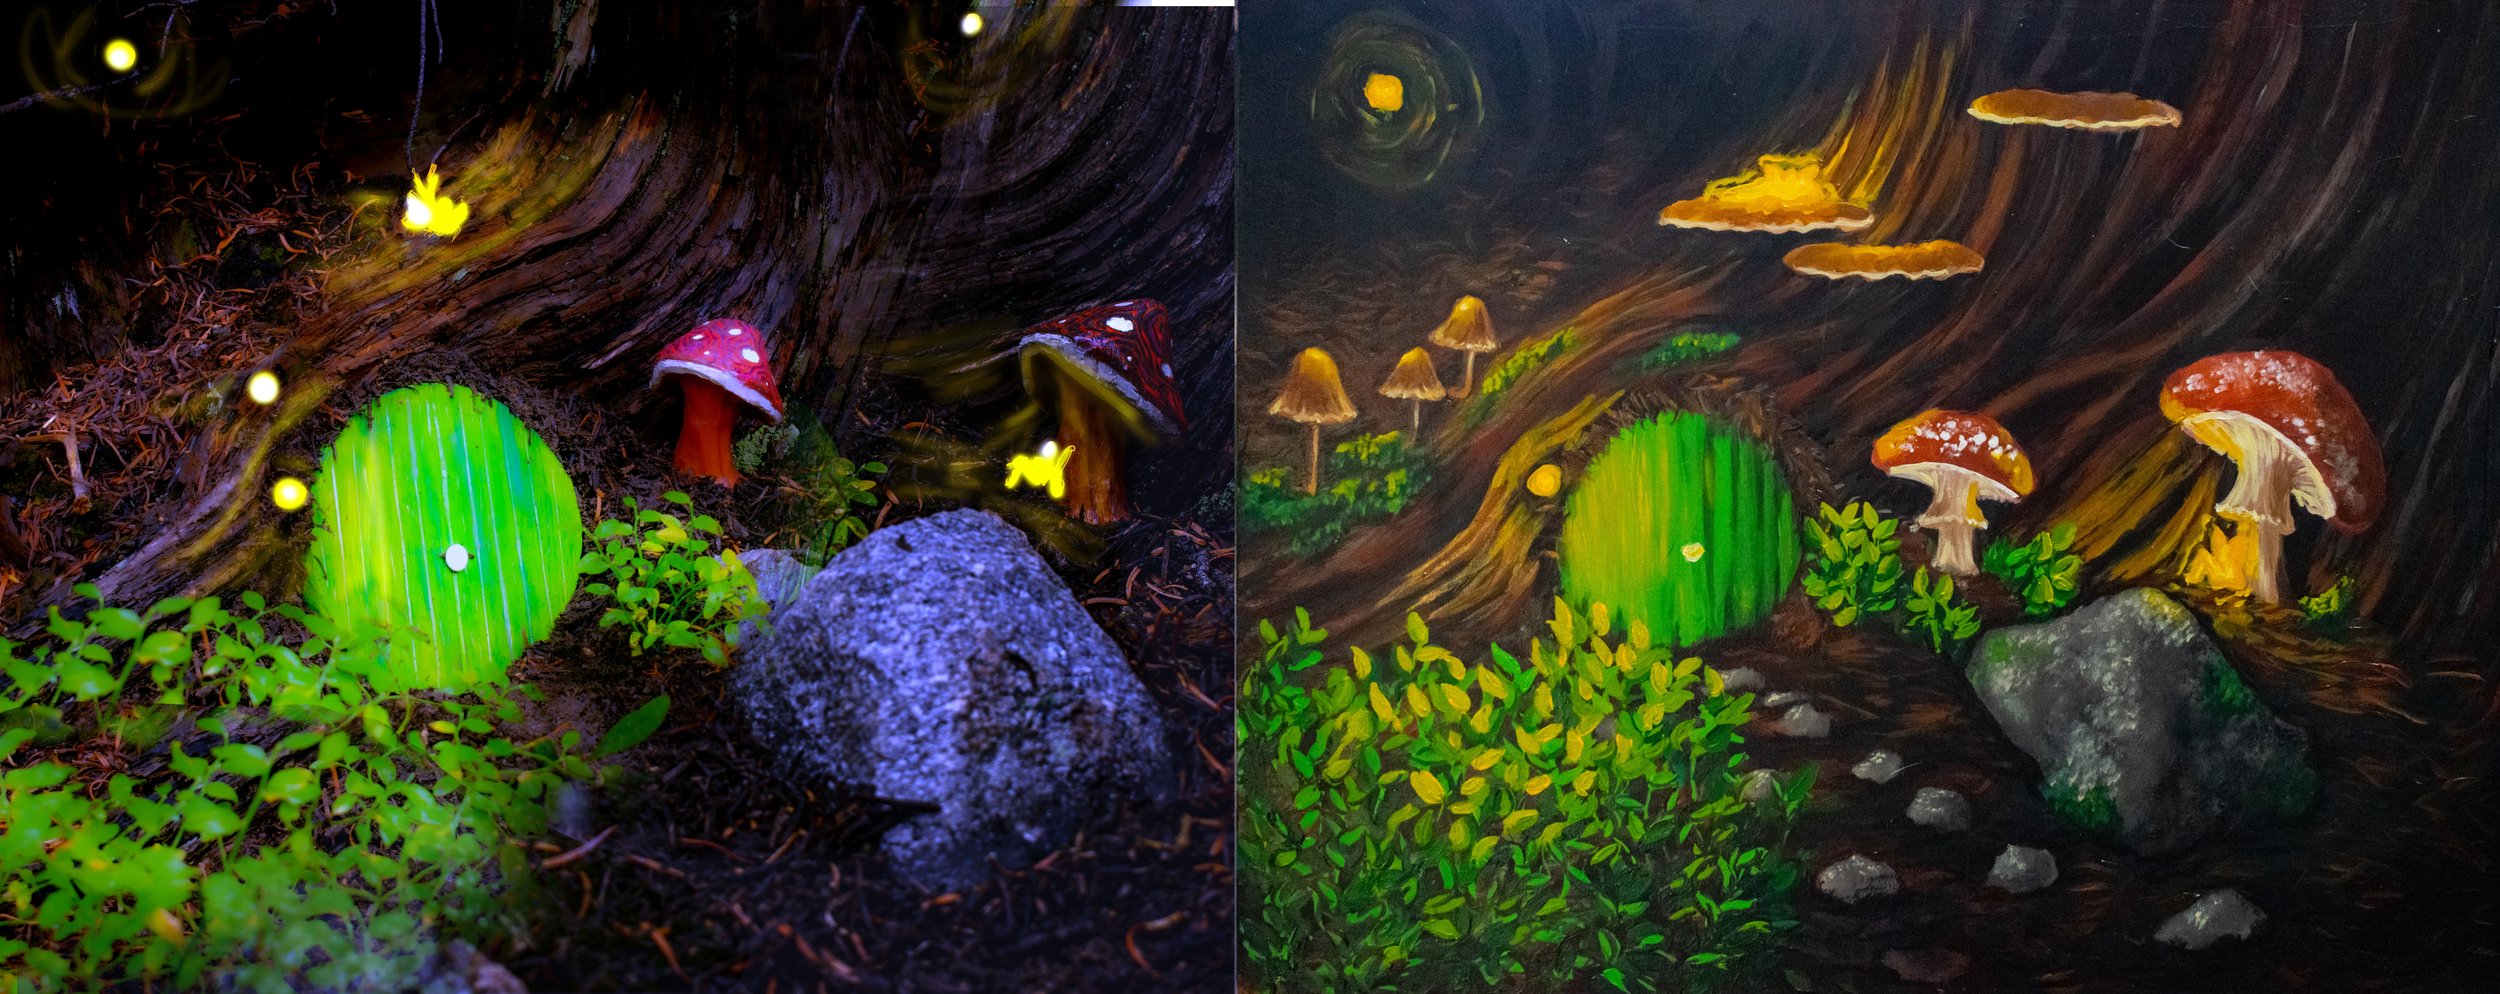
One of the most underrated design concepts for immersing your audience in your work is lighting! There is a scale of believability, and when you’re creating a scene that just doesn’t exist, each of the pillars of design is necessary to make sure it looks like it could exist. Don’t be too proud to use reference photos, because those will help you accomplish this much more effectively. I’m going to walk you through how I got the above photo reference to paint the finished illustration to the right of it!
First, you’ll want to have 3D models for your primary objects so it can capture the lighting accurately. If it’s something that exists that you can buy a figurine of, perfect! If not, you have a new project to play with. With my little hobbit door and mushrooms, I carved these from wood – an ADHD hyper-fixation that ended as soon as it began. But it was nice! Working with my hands in new ways helps me get into the flow state. Wood working was meditative, just as painting is for me. I’ve also sculpted with sculpey which has been my one of my absolute favorite arts (behind oil painting, of course).
I packed these sculptures in my Bigfoot lunchbox and hit the trail in Colorado’s Indian Peaks Wilderness where it was still vivid green and moist out even in August. It felt like the Pacific Northwest, which was exciting for this kind of scene.
Don’t be afraid to crouch and play in the forest like Sméagol, looking for the perfect fairy front yard, or if you’re looking for the perfect stone formation at the top of a 14-er like Sam and Frodo trying to find your perfect dragon lair! Creating whimsical art requires a bit of a loose screw.
I found this tree root that had a perfect semi-circle for me to place the door in, and from there it was about finding good vectors to place the mushrooms on and cover each with surrounding dirt and sticks. Planning the composition even slightly during the reference phase helps a ton with getting the painting’s composition just right! Here’s an example of what I mean by vectors and composition, how they worked in both:
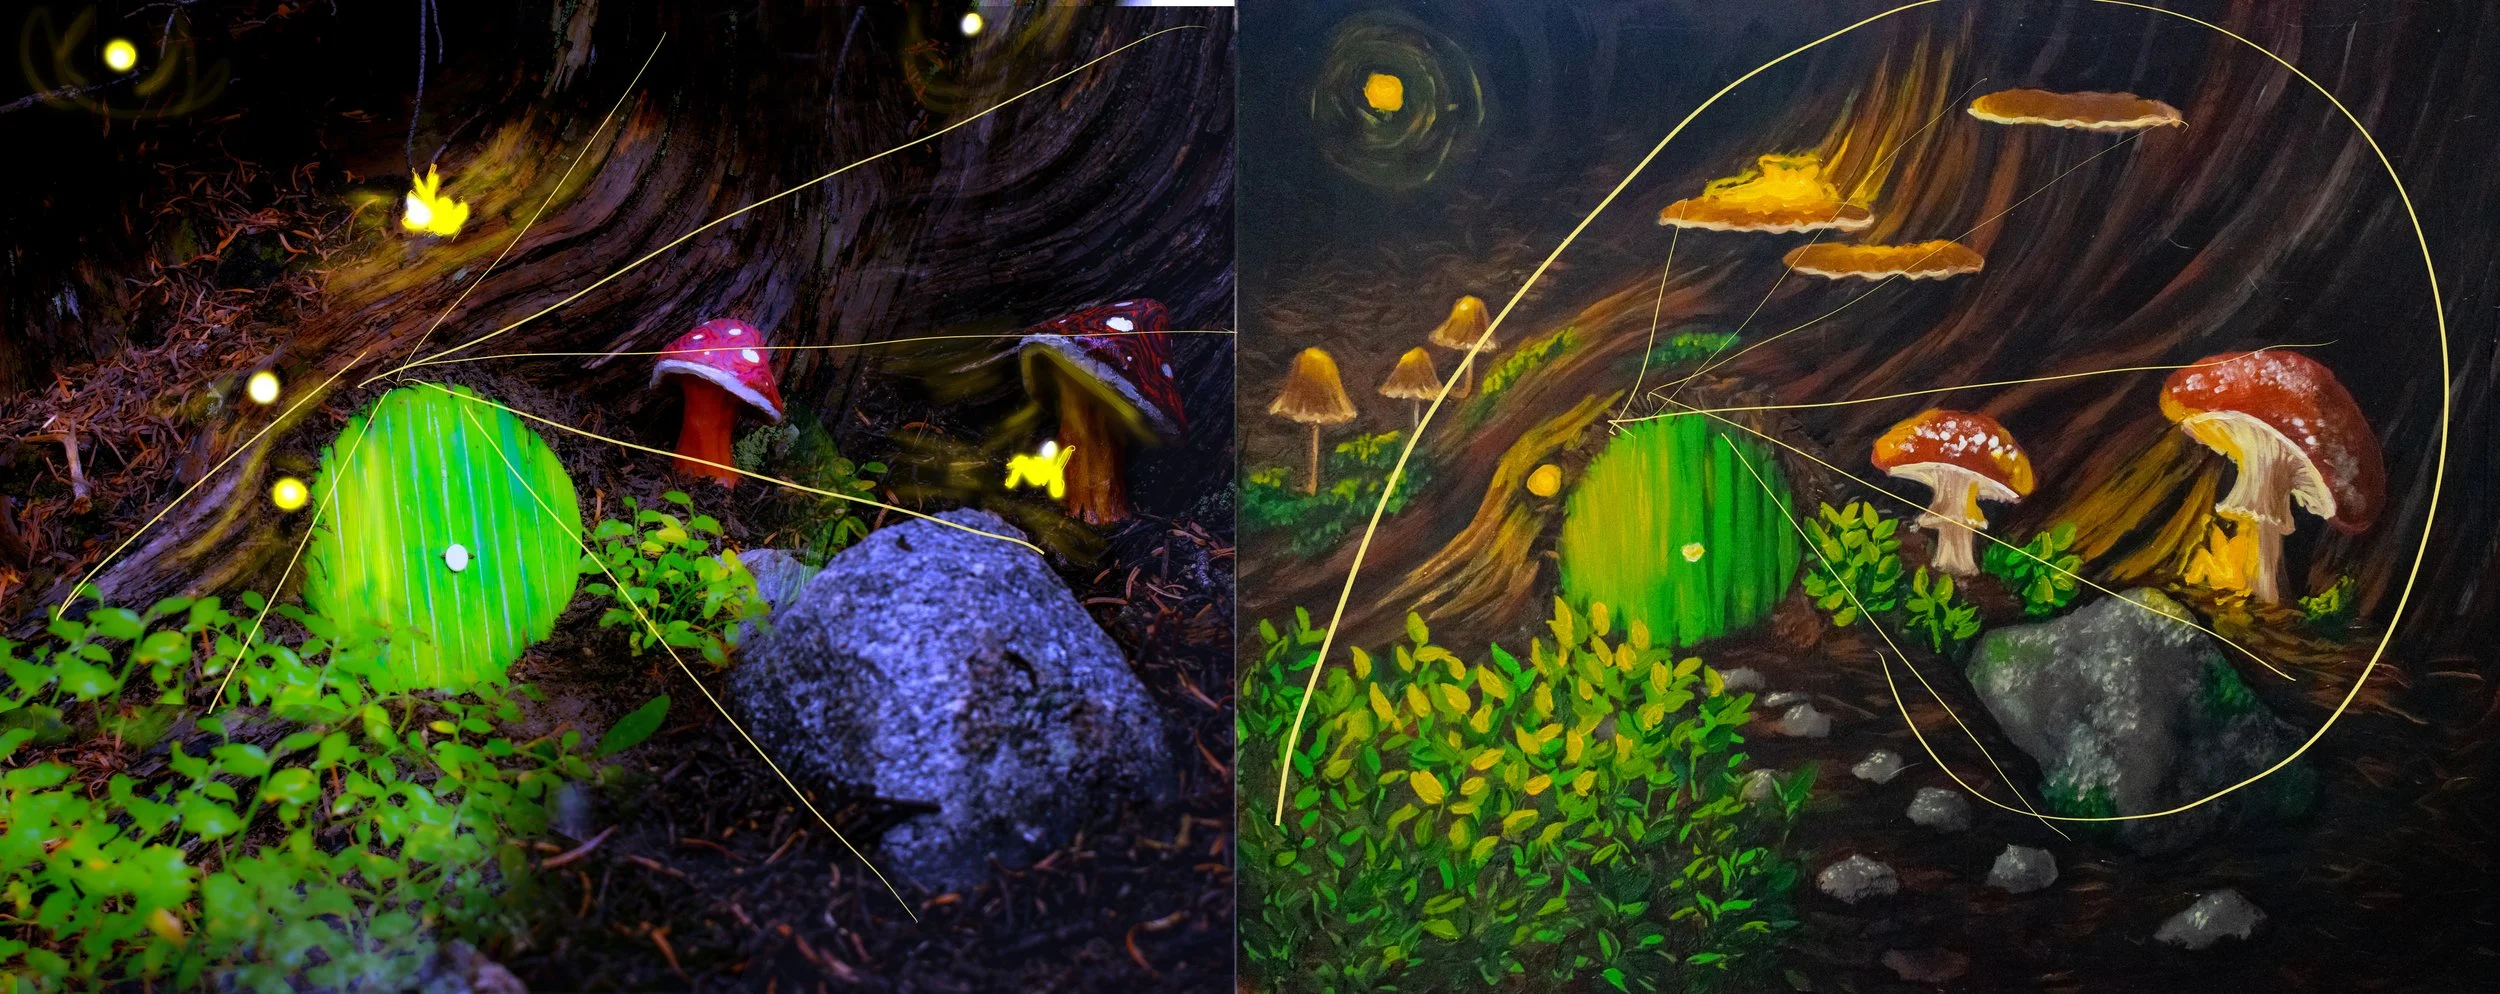
Here is the use of radiating lines and the golden ratio in composition!
So now you have your photo to reference for your painting! I would recommend playing around in Lightroom or a photo editing program to get the mood of your image and make any changes you need. I actually doubled this photo on the right hand side to get some more real estate for the width of the painting, and used a brush editor, upping the exposure for my fairy light sources, tinting it yellow. If you want a more in depth blog about photo editing just let me know!
I hope being able to see these helps give you some ideas for getting into nature to reference for your art!